
Quick answer
A mold for an automotive interior part moves through seven gates before it earns the right to run production: DFM review, mold design freeze, steel cutting, T1 first trial, T2/T3 correction cycles, dimensional and cosmetic approval, and finally PPAP / first article approval against the checking fixture. Each gate has a defined deliverable and a defined sign-off. Skipping a gate does not save time; it moves the cost to tool welding and containment.
The distance between a CAD model and a part that passes the customer's fixture is not measured in machining hours. It is measured in decisions. A wiring harness bracket that fits perfectly on T1 and a door panel that needs four correction loops differ less in complexity than in how many of those decisions were made early, on paper, with the customer in the room.
This is the workflow we run at Hangzhou Xucheng for automotive interior tooling, from the first DFM meeting to the signed first-article report. It is written for program managers and supplier-quality engineers who need to know what should be in hand at each stage.
Stage 1 — DFM review: the cheapest place to spend engineering hours
Design for Manufacture is where the tool cost is actually decided. On an automotive interior part, the review covers five points and produces one marked-up drawing set:
- Parting line placement — chosen so it falls on a non-visible edge on grained A-surfaces, and so the mold can be built in a straight-pull configuration wherever possible.
- Gate type and location — typically a hot runner for high-volume interior trim, with gate position set to keep weld lines out of visible and structural zones.
- Ejection plan — ejector pin layout on a large door panel or lower side panel, with pad locations agreed so they do not print through the visible face.
- Cooling layout — conformal or baffled circuits in deep cores and tall bosses, to even out cycle time and reduce warpage across a large flat panel.
- Wall and rib feasibility — nominal wall, rib thickness at 0.5 to 0.6 of nominal, and sink-mark risk on the opposite face.
The deliverable is a DFM report: marked-up drawing, gate and weld-line prediction, ejection and cooling concept, and a preliminary tolerance chart. Nothing should be cut before the customer signs this off.
Stage 2 — Mold design freeze
This is the last point at which a design change is cheap. The freeze package typically contains a mold assembly drawing, a core and cavity layout, the gating and runner system, the cooling circuit diagram, the ejection system, and the steel selection per component.
| Mold element | Typical choice for interior trim | Why it matters |
|---|---|---|
| Core / cavity steel | Pre-hardened or hardened tool steel, selected per production volume | Determines mold life and how well a grain texture holds up |
| Gating | Hot runner for high-volume; cold runner for lower volume or colour-change flexibility | Controls weld-line position, scrap rate and cycle time |
| Cooling | Baffled or conformal circuits in tall bosses and deep cores | Warpage control on large flat panels; cycle time |
| Ejection | Ejector pins plus a stripper plate on deep-draw panels | Prevents scuffing on grained surfaces |
| Slides / lifters | Only where undercuts or side features require them | Every slide adds maintenance and cycle time |
Two patented technologies from our own mold portfolio are specified in this stage where the geometry calls for them: a modular injection mold system that simplifies core exchange and maintenance, and a gas-mark elimination mold technology that addresses the burn marks and gas traps that otherwise show up on the inside of large panels.
Stage 3 — Steel cutting and electrode work
Machining runs on 15 in-house mold machining units covering CNC milling, EDM, precision grinding and cutting. In-house capability matters here for one reason: the correction loop in stages 5 and 6 depends entirely on how fast a core insert can be re-cut or re-sparked. A tool shop that outsources EDM adds days to every correction cycle, and a program with three correction loops pays that penalty three times.
Key checkpoints before assembly:
- Roughing complete, stress-relief applied where the design calls for it.
- Electrodes verified against the 3D model before burning, not after.
- Cooling circuits pressure-tested and flow-checked before the mold is closed.
- Texture sample plaques prepared and approved against the customer's master.
Stage 4 — T1 first trial: read the samples, not the report
T1 produces the first moulded samples. What matters at T1 is not whether the parts are good — they rarely are — but whether the data collected explains why. A useful T1 report covers:
- Fill pattern and short shots at progressively reduced shot size, which reveal the true flow balance and confirm or contradict the predicted weld-line locations.
- Dimensional report against the agreed critical dimensions, measured with the datum scheme from the DFM stage.
- Cosmetic assessment against the master plaque, with photographs of flow marks, sink, silver streaks and gate blush.
- Process window — the fill-to-pack transition, holding pressure range, and cycle time achieved on the press actually assigned to the program.
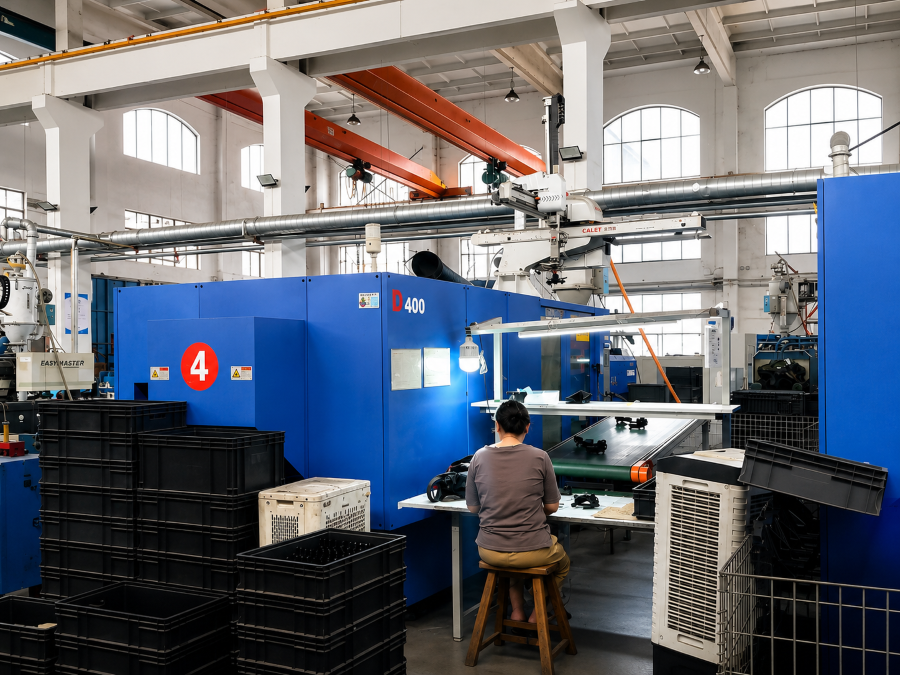
The press matters. A part developed on a 650 t machine and then transferred to a 1,600 t press for production will need re-validation of the process window, even if the tool is unchanged. Assigning the production press before T1 avoids a repeat of the exercise.
Stage 5 and 6 — Correction cycles T2 / T3
Correction is normal. What should not be normal is a correction without a root cause. Each loop should close one item from a tracked list, with the steel change documented against the measured deviation.
| Symptom | Common root cause | Typical correction |
|---|---|---|
| Critical dimension consistently out in one direction | Shrink assumption off for that feature or flow direction | Adjust the affected core or cavity region, not the whole tool |
| Warpage on a large flat panel | Uneven cooling or unbalanced packing | Add or rebalance cooling circuits; revise gate position if needed |
| Scuffing or drag marks on grained surface | Insufficient draft or texture too coarse for the release angle | Increase draft on the textured wall; re-polish or re-texture locally |
| Sink mark opposite a rib or boss | Rib too thick relative to nominal wall | Reduce rib thickness toward 0.5 of nominal; add a transition taper |
| Gas marks or burn at the end of fill | Trapped gas at a weld line or blind feature | Add venting; apply the patented gas-mark elimination approach on the affected insert |
For programs on the tight side, T2 and T3 are enough. A program that reaches T4 or T5 is usually one where the root cause was never agreed at T1.
Stage 7 — Approval: dimensional, cosmetic, then PPAP
Approval is three separate sign-offs, and they should not be bundled:
- Dimensional approval — the full critical-dimension report, produced from a run at the production press, with a documented process window.
- Cosmetic approval — a signed master sample against the approved plaque, plus agreed limits for flow lines, gate remnants and parting-line witness.
- PPAP / first article approval — the measurement package, capability studies on the critical characteristics, material certificates, a run-at-rate record, and the checking-fixture correlation. For automotive customers working to ISO/TS16949:2009, this is the package that closes the loop between the drawing and the line.
Once approved, the process parameters are sealed as the standard for production, and any later change — a material lot, a press, a colour masterbatch — is treated as a change requiring re-validation on the affected characteristics.
Why the sequence is worth protecting
The seven stages exist because cost moves in one direction. A change at DFM costs an engineering hour. The same change at design freeze costs a redesign pass. At T1 it costs a steel correction and a re-trial. After PPAP it costs a customer concession, a containment action and a field-risk review.
A molder running 200 t to 1,600 t machines across automotive, medical and appliance programs has to run this sequence identically on a 40-gram harness bracket and on a large door panel. The tonnage changes; the gates do not.
FAQ
How long does it take from DFM approval to first article approval?
For an automotive interior part with a straightforward geometry, the typical sequence of tool manufacture, T1, two correction loops and approval runs in the region of eight to twelve weeks, with sample availability and material lead time being the main variables. Complex large panels with slides, deep cores and a multi-zone hot runner sit at the longer end. The counter-intuitive point is that adding a DFM iteration at the front usually shortens the total, because it removes a correction loop from the back.
How many trial shots should we budget for?
Budget three: T1 to establish fill and identify the correction list, T2 to verify the steel changes, and T3 to confirm repeatability and produce the approval samples. Programs routinely finish in two. If a program is heading into a fourth or fifth trial, the productive response is to stop and re-agree the root cause rather than to keep adjusting the process window, because a repeated symptom after a steel change usually means the diagnosis was wrong.
Do you need a checking fixture before PPAP?
For flexible or large interior parts, yes. A door panel, lower side panel or side guard measured in a free state can show deflections that vanish once the part is restrained as it is on the vehicle. A checking fixture reproduces that restraint and makes the PPAP dimensional report correlate with what the assembly line measures. For small rigid parts, a CMM with a documented datum scheme is normally adequate, and the fixture cost can be avoided.
What causes gas marks and burn marks on molded parts, and can they be eliminated?
They come from trapped air or decomposition products that cannot escape at the end of fill, typically at a weld line, a blind boss or a rib cluster. Standard fixes are additional venting and a review of the fill balance. Where the geometry makes conventional venting impractical, a dedicated mold technology can be applied to the affected insert to eliminate the marks at source rather than masking them with a process adjustment. Either way, the issue should be resolved in the tool, not left to the operator.
Can a tool be transferred between presses after approval?
Physically yes, but the approval is tied to the validated process. Moving a tool to a different tonnage or a different screw and barrel changes the fill and packing behaviour, so the critical characteristics have to be re-verified on the new press before production releases. The efficient approach is to assign the production press before T1, so the initial process window is established on the machine that will actually run the program.
Start your mold program with a DFM review
Hangzhou Xucheng Automotive Components Co., Ltd. is an ISO/TS16949:2009 certified manufacturer of automotive interior injection molded parts, operating 13 molding machines from 200 t to 1,600 t and 15 in-house mold machining units covering CNC, EDM, precision grinding and cutting. Our mold portfolio includes a patented modular injection mold system, a patented mobile injection molding machine design and a patented gas-mark elimination technology. We handle mold development, custom design, injection production and quality inspection as a single sequence from DFM to first article approval. Send your part data to start the DFM gate.